How to Leave a Comment on Our Blog

HOW TO LEAVE A COMMENT ON THIS BLOG
1. Scroll to the end of the post.
2. Click on the phrase "0 comments" or, if there are comments it will indicate how many, for example, "8 comments." Clicking on this will open the comment option for you.
3. Type in your note.
4. Choose your Profile. If you don't understand the choices under Profile then choose Anonymous but PLEASE type your name and location at the bottom of your comment so I know who you are!

Sunday, January 19, 2014

The Functional Boat Galley: Jaq Answers a Blog Follower From the USA

"Good morning Jaq, I so enjoy following your blog. Lots of prayers for continued recovery for Les and strength for you. I have a question. So many wonderful things come from your kitchen, I am wondering what kitchen things you have when you have such a small space. I look at all the things in my kitchen and wonder if I really need so many kitchen gadgets, pots,pans etc. Odd question.....I hope not. Take care, Karren" ~blog reader. Lebanon, Oregon, USA

   It's always a treat to hear from our readers. I decided to answer Karren's query with a post and include some pictures, while Les works on research for his next historical canal post.
   In my previous life back in the USA I used to have a private catering business. It was one way I made extra money while earning my university degree. I used to cater private dinners for 2-6 people. I also used my culinary skills to cater university child care scholarship fundraisers for 50+ people each quarter.  And once upon a time, long ago in Alaska I contracted with local families to cook their holiday pies as a way to earn extra money. I also worked as a pastry chef at a lodge.
   My kitchen at Cloudhouse in Pullman, Washington was a cook's dream with a large U shaped space, double wall ovens, a cook top, a huge refrigerator/freezer with another freezer in the utility room, double sinks, a dish washer and a large counter/breakfast bar. It had oodles of storage space and a healthy sized pantry.
   Whittling down all of my kitchen ware to what was essential on a boat with a galley about 1/10th the size of my kitchen was tough, but I had a really good guideline to follow, provided by Fine Cooking magazine. I had subscribed to this magazine for fifteen years and saved all my copies. I like it because FC is a comprehensive magazine for those who love cooking. It provides fabulous recipes with easy to follow instructions and lovely photographs to illustrate each step. FC also explains the chemistry involved in cooking, i.e. food science. I couldn't imagine throwing away my collection: all those recipes and all that knowledge! So in addition to paring down my kitchen gear I also had to figure out how to bring the best of those magazines with me.
   I decided to buy a large, high quality, hard cover "empty" book into which I added tabs for each section and pasted the best recipes from nearly two decades of my favorite periodical, interspersed with my tried and true family recipes. It took me about four hours every evening for three solid weeks to complete my recipe book. Les has nicknamed it "The bible!"
  One of the many indispensable pull out guides in FC magazine was "100 Tools for the Well-Eqiuipped Kitchen."There are seventeen items on the list I do not have as they are not applicable to my life aboard a narrow boat. Otherwise I actually have a very well equipped, fully functional kitchen, also due in large part to my Best Beloved.
Fridge below the counter...
and after the move!
When I moved aboard the boat Les had already moved the refrigerator from below the galley counter to above it. Had he not done so, I would have spent a lot of my time every day, on my knees or belly trying to see what was 
 stored on the bottom shelf in the back of the fridge. Moving the fridge up gave Les room to move the washing machine into the galley underneath the fridge and opened up room in the wardrobe for my clothes. Basically though the galley was unchanged in function. Les stored food, pots and pans and dishes in one large cupboard with two shelves, next to the stove. For a bachelor this worked just fine!
   After my 640 pounds of worldly goods arrived from the USA in October of 2011, Les set to work building a tall, narrow cupboards from IKEA bookcases to house our dishware and glassware. He built a similar smaller cupboard for condiments, and took out the shelf in the large bottom cupboard next to the stove, building in two large sliding drawers for my pots and pans. These changes increased the functionality of the galley for me. 
Outside of the smaller condiment cupboard...
and inside!
Glass & dishware cabinet.
Bottom of this cabinet with dishes and larger pots/serving bowls.


The slide out drawers Les built for me with a lid rack on the inside of the cupboard door.
   The secret to making these drawers work on a boat? Nesting everything! In the top drawer I have:  9x13 and 9x11 glass baking pans, 2 loaf pans, four strainers of different sizes, 2 funnels, a large square Corning Ware baking dish with lid, two 9" glass pie pans, a meal steamer, an ice cube tray, 6 nested Pyrex storage bowls with lids and a wire cooling rack for baked goods.

   In this bottom drawer I have medium and small Corning Ware baking pans with glass lids, two 9" round cake pans, a salad spinner, a small Corning Ware saute pan with lid, a 10" deep sided stainless steel frying pan with lid, an 8" saute pan, 3 quart stainless steel pan with a lid, 1 quart pan with a lid, three Pyrex liquid measuring cups, a set of nesting dry measuring cups, a large stainless steel mixing/serving bowl, 2 glass mixing bowls, a serving tray, and the chopping bowl and lid for the immersion blender.

   In place of shelves Les installed wire drawers form IKEA to serve as pantry storage for food dry goods, baking sheets and large platters. I love these because they hold loads of stuff, they are easy to see into and to clean.


No matter where I cook I also follow three rules: 
   1. Never cook in a messy kitchen. I always run a sink full of nearly boiling hot water with some dish soap and bleach in it. I wipe everything down before I start cooking and put away everything that is not germane to my task at hand.
   2. Lay out all the ingredients necessary for a recipe. Measure it all out, slice it, dice it, and have everything ready. professional chefs call it the mise en place or "in its place." This saves time and keeps one focused on the recipe.
   3. Clean up as you go. As I move through a recipe, I stop for a minute, turn to my hot dish water, ring out the sponge and clean up. I put away all ingredients I have finished with and wipe my work area down, drying it with a clean dish cloth. Then I move on to the next step. If I am preparing an entire meal, I take 2 minutes here and there to wash up the utensils and dishes I've dirtied, rinse, dry and put them away. It is the only way to maintain order in a small galley kitchen. 
Ceramic butter keeper
Nesting doll dry measure cups
   The items I find indispensable are: a good quality chef's knife, three 4 inch paring knives, serrated bread knife, a knife sharpener, mortar and pestle, heavy duty Dutch oven, baking sheets, 9" spring form pan, immersion blender/beater/chopper, 2, 4, & 8 cup Pyrex liquid measuring cups/ nesting Matryoshka style dry measuring cups, hand held wire whips, spice rack, IKEA stainless steel bowl, kitchen timer, kitchen scale, salad spinner, strainers, 12 quart stock pot, stainless steel covered saute pan, and ceramic butter keeper. The butter is in the lid and the bottom holds water which insulates the butter keeping it at an even temperature--important on a boat where the temperatures inside can vary by ten degrees or more from early morning to early evening. 
   I also extend my cold storage space in late fall and throughout the winter by setting large pots of soups, stews and other items in covered storage bowls on the bow locker. I also store fresh greens, herbs, root vegetables, bread, and other items in the bow locker itself. This only works in cold weather though. 
   The things I find difficult: mainly the itty bitty boat oven! It is poorly designed and does not hold heat well at all. In addition if I want to put a covered casserole dish or pan in the oven I can only put small and mediums sized covered pans on the middle rack and large ones on the small rack--otherwise the pans won't fit in the oven. All the heat goes up to the top so this means it takes longer for things to cook and cooking temperatures have to be readjusted.
   For example, in my ovens at Cloudhouse it took 30-40 minutes to bake to 9 inch round cakes. In the boat oven it take two hours and I have to turn the pans every fifteen minutes due to hot spots; I also have to switch them from the top rack to the bottom rack every 30 minutes. I have baked a 9x13 pan of escalloped potatoes for two and half hours at 350F (gas mark 4), to find the potatoes in the middle were raw and hard. The same recipe cooked in the very same pan at 350F in my home oven at Cloudhouse would take no more than 45 minutes.
   I've also had to learn to live without a toaster. In the States the oven has a heating element on the bottom for baking and another element on the top for "broiling" as we call it. One would turn the oven knob to broil and the top element gets broiling hot! Hot enough to grill a pizza or sear a nice steak on the top rack of the oven.
   Over here cookers come with a separate section called the grill. Toast is made on this grill and bacon is browned on it. I've found it good for little else. One certainly cannot grill a tender pork chop or a steak on it--it doesn't get hot enough. It is a grand place to warm the plates though! 
   I love our galley aboard NB Valerie. If we were designing a boat I would change a thing or two, but overall I am quite happy with what we've got. As far as boats go, the galley design (two counters with cupboards and utilities on each side that run for a certain length with a walkway down the middle) provides the maximum space usage as compared to other designs such as a U shaped galley. I love that I can cook while visiting with folks because it is an open plan. I also appreciate being able to stand in the middle of the galley and basically reach nearly everything by merely turning around in a circle. Our galley is five feet, nine inches wide and 8 feet, four inches long. 
The condiment cabinet is to my right as I look down the galley. The grill/oven is underneath the cook top. The fridge and washing machine are to my left. The slim dish and glassware cabinet is just past the sink on the left, with the immersion blender unit mounted on the side.
Four IKEA spice racks mounted side by side near the stove top. The condiment cabinet is at the end of the counter.

   I hope that answered your question Karren. Thanks for following along on our blog. Feel free to email with questions, etc. any time. If anyone wants the list of 100 essentials for a well equipped kitchen, just email me and I will send it along.

Wednesday, January 15, 2014

The Airhead Marine Composting Toilet--One Year On

“When you've finished your own toilet in the morning, then it is time to attend to the toilet of your planet, just so, with the greatest care”~ Antoine de Saint-Exupery

    It was one year ago in October that we installed the Airhead marine composting loo in NB Valerie. Since we weren't cruising recently, we thought it time to provide a loo update for the curious and concerned. This will be a frank and open discussion of the use of this loo system so change blogs now if you are sensitive about bodily functions.
   Basically as we said in the first post about this (October 20, 2012, What Every woman Wants For Her Birthday), if this loo is being used daily the contents will only be half composted when the toilet requires emptying. The very bottom and middle layers will have begun the composting process but the newer layers will not be broken down completely. Nevertheless, there is no rank smell, and with a bit of planning and a well constructed  Army spade, Les and I managed as a team to clean the new loo once every six weeks. It took a total of thirty minutes and while not a pleasant chore (who can really call any toilet cleaning exercise pleasant?), the semi-monthly loo cleaning aboard NB Valerie was not awful. The scent of a peat bog or a cooking compost heap was the main odor--one Les never found offensive in any way and that was only when the toilet was apart for cleaning. Otherwise--no odor. We've never once smelled anything unpleasant wafting out of the toilet roof vent when we've been cruising, moored up, or when either of us have been up on the roof.

FIELD TESTED UNDER DIFFICULT CONDITIONS
   When Les' colon literally went south this past summer as cancer took hold of him, very nearly blocking his rectum with a massive tumor, Les had to take Dulcolax stool softeners throughout every day in order to pass anything at all--and everything came out liquid with trips to the loo necessary as many as twenty times a night as his health worsened and months passed while we waited for the surgeon to book the operation.
   The Airhead tried valiantly to keep up with this. As anyone knows who has really reviewed this composting marine loo, it works so well because the liquids and solids are separated. From July until October when Les underwent surgery to remove the mass, we went from cleaning out the loo once every six weeks to cleaning it out every three weeks, then every two weeks, and finally once a week. The unpleasant whiff of soured chocolate (cocoa shells remember) that occurred then was only very obvious to me--Supernose. We had visitors aboard during this time who never had a clue what was happening or not happening under the toilet pan. 
   We cleaned the loo together the last time on October 14th--the day we locked up the boat and spent the first of two nights at the Watford Travel Lodge so Les could undergo the experience of a total bowel cleanse before surgery on October 16th. At this point it was only me using the loo so I cleaned it all by myself for the first time. 
   Now I empty it once every four weeks because that is what I am most comfortable with doing, but the Airhead loo could easily accommodate another two weeks. It still only takes thirty minutes. The process goes as follows: because we have a teeny, tiny postage stamp sized bathroom, I remove all towels, pajamas, robes, rugs, and anything else which could get in my way. 
   I set out a package of nappy wipes (diaper wipes), and a spray bottle of Flash cleaner with bleach. I get a large, thick black plastic bag and close one side of the opening in the two doors underneath the bathroom sink. This holds the large bag open and in place. I don a pair of plastic gloves and loosen the four wing nuts holding the top to the bottom, remove the top which is essentially the toilet seat compartment and set it upside down in the bathtub.
Folding 25" Army spade
   I get the spade which lives in a plastic carrier bag, discreetly tucked away outside on the bow and scoop the solids out of the bottom of the loo, disposing of each shovel full in the black bag. When the solids compartment is empty, I clean the spade with baby wipes and bleach spray and put it away in its plastic carrier bag on the bow.  I change my plastic gloves, and with clean ones on, I use nappy wipes to clean up the outside and part of the inner section of the bottom. I also use this opportunity to clean up the wall and floors around the loo of any accumulated dust and grime from the month. 
   I strip off the plastic gloves, fill the bottom of the loo with fresh cocoa shells and a Tablespoon of compost starter. Then I don another pair of plastic gloves and using the spray cleaner with bleach, I turn my attention to the top toilet compartment resting in the bathtub. Once that has all been wiped down clean, I set the top part back on the bottom section and remove my plastic gloves to screw the wing nuts back in place and re-attach the fan hose. The urine bottle is cleaned out every two days when we empty it. Job almost done!
   I tie up the black plastic bag and set it out on the bow for disposal. Then I clean out the bath tub, wipe down the sink and cabinets, sweep and mop the floor, hang all the towels, robes, and pajamas back in the bathroom and call it good. Thirty minutes from start to finish which equals six hours a year.
   The point of all this narrative is to say that while not pleasant, it is easy enough to do, offers me a chance to really scrub up the entire bathroom once a month and I only have to do this twelve times a year--not every two and a half days of faffing about with awkward shaped, fifty plus pounds of loo cassettes which have to be negotiated from awkward places aboard the boat, and which sit literally stewing into a nasty, bacteria breeding, stinking stew which then must be disposed of when we find a service point with an Elsan.
   Not only could I not lug the cassettes we used to have, but I couldn't maneuver them off and on their tracks while rooting around in a large, deep cupboard underneath our bed, and I certainly could not go anywhere near an Elsan, popping the lid on a cassette to empty it.
   If we had still had the cassette toilet system in place when Les went into hospital we would have been screwed to put a not too fine point on things. I would have had to find some poor bloke who was willing to come aboard, get on their knees, pull the full cassette out, put the empty cassette in place, and take the full unit down to the service point to empty--every two days!!
   Even now I make sure we go to the service point for water very early in the day before folks are using the Elsan services. The last time we got up there late in the day, some poor boater was in the process of emptying his loo cassettes as I rounded the corner to throw some rubbish away. The smell hit me like a punch to my gut. I dropped to my knees and puked up lunch while the bloke at the Elsan--oblivious to the odor of his ordure--stuck his head out the doorway to inquire if I was all right.
   We still love our Airhead loo and me even more so now that I am the one who cleans it out from start to finish. For Les, it means he no longer has to tackle the toilet chores on his own. For me it means independence. I can do it myself and we are not tied to Elsan points at least once a week to empty cassettes. Finally, we are no longer using our precious water supply to flush poo. We are also not contributing to the sewage plants of this country. Left to its own devices, the solids in the black plastic bag will compost and return to nature something that is useful and harmless requiring no sewage plants and chemicals.

PROBLEMS AND TIPS FOR USE:
   Different strokes for different folks. I do realize this system is not the choice for everyone. Recently in a surf through boater's blogs I came across one on which the boaters described their trials with the same toilet system we have. They quickly found themselves disenchanted with their Airhead loo. After several months use they found their loo smelled; unpleasant smells came from the roof vent and wafted back to the stern, and cleaning out the loo was a onerous task for them. We were quite surprised and sad to read of the problems these folks experienced because, honestly we haven't had any problems at all. 
   We tried to think of why they might have encountered problems and we decided to share the following:
   We've only had problems twice in just over one year. One month after we installed our Airhead, the fan for it suddenly quit working. Almost immediately I could smell the toilet. Now Les didn't smell it unless the bottom flap was opened but I could smell it out in the hallway when the flap was closed. A quick word with the UK distributor at Hillmorton and a new fan was dispatched without charge. In the meantime Les discovered that small, round computer fans will also work and we have an extra on hand in case this occurs again. To date the second fan is still working fine.
   About three weeks ago our toilet quickly developed an unpleasant smell like an over full cat box when someone came aboard and disregarded our instructions for the use of the loo. They urinated into the toilet with the solids flap open, saturating the solids compartment with liquid. Within 24 hours I could smell it and the loo had to be prematurely cleaned out and reset with cocoa shell and compost starter. 
So here are some tips we've found which ensure our composting loo functions perfectly: 
   1. Be absolutely religious about keeping urine and solids separated. For women this means after urinating, throw your toilet wipe away in a rubbish bin. This keeps the solids receptacle from filling up with soggy wads of toilet paper.
   2. Again mainly for women, since men have a longer urethra and a built in short term storage system, one must develop strong sphincter and pelvic floor muscles. If you are making a solid deposit and need to wee, you have to do one first and then follow up with the other. In other words, either go wee first so it all goes in the urine bottle and then open the bottom flap and get on with your solids business, or vice versa.
   3. When we purchased our Airhead, all the literature that accompanied the toilet recommended the use of crenelated paper coffee filters set in the toilet pan whenever one had to make a solid deposit. Lower the lever, the flap opens and the filled filter drops into the solids compartment; however Richard, who
sold us our unit, said after awhile one gets comfortable enough using this toilet to do away with the filters. Just sit, open the flap and go. The solids drop down and the bottom compartment fills less quickly and without the paper filters filling it up. This works fine for us but we keep the paper filters on hand for guests to use. If children visit the boat it is essential an adult accompanies them to the loo and explains how it works. Children are easily distracted and can forget one must "be here in the moment" and pay attention when using a composting loo.
   4. Churn it up!  It is essential for the composting action and airflow on this loo to crank the handle on the bottom solids compartment at least once a day. After every solid deposit is best.
   5. Every Saturday I add about one cup full of cocoa shells to the solids compartment. Even though there is no liquid going into the solids container,
human solid waste is still a bit wet. Adding in cocoa shells once a week keeps a very good balance between truly dry ingredients and slightly wet stuff, which is essential to any compost be it in one's heap in the back yard or in the composting loo. A 70 litre bag of Arthur J. Bowers Cocoa Shell lasts us one year and costs on average £12.99. 
   If you have just found this post and would like to read more about our installation of the Airhead with pictures, then please click on the bold title below and it will take you to the post titled, "What Every Woman Wants for Her Birthday." 
   You can also read an interesting article on composting loos in which ours was one of those featured, in Canal Boat magazine, September 2013. The link is available up on the right hand side of this blog. Just click the picture of the magazine cover. 

Tuesday, January 14, 2014

Away from Marsworth


We left the reservoir
mooring on Sunday and the first stop was Marsworth yard to fill the water tank and dump the rubbish. This gave me a chance to go up on the bridge on a non working day to get a close up of the work being done. Ok so perhaps I was scaremongering  by saying the next blog might be one of the bridge collapsed etc. I am happy to report the drilling was away from the centre span and was in fact into the main supports resting on each bank. One side already dug out shows a thick slab of concrete exposed that has obviously been there some time. I assume the work they are doing will tie into this slab.
With the tank filled we set sail under a cloudy sky within our winter cruising time of 11am till 2pm. This is generally the warmest part of the day and besides who wants to cruise more than 3 hrs in winter.
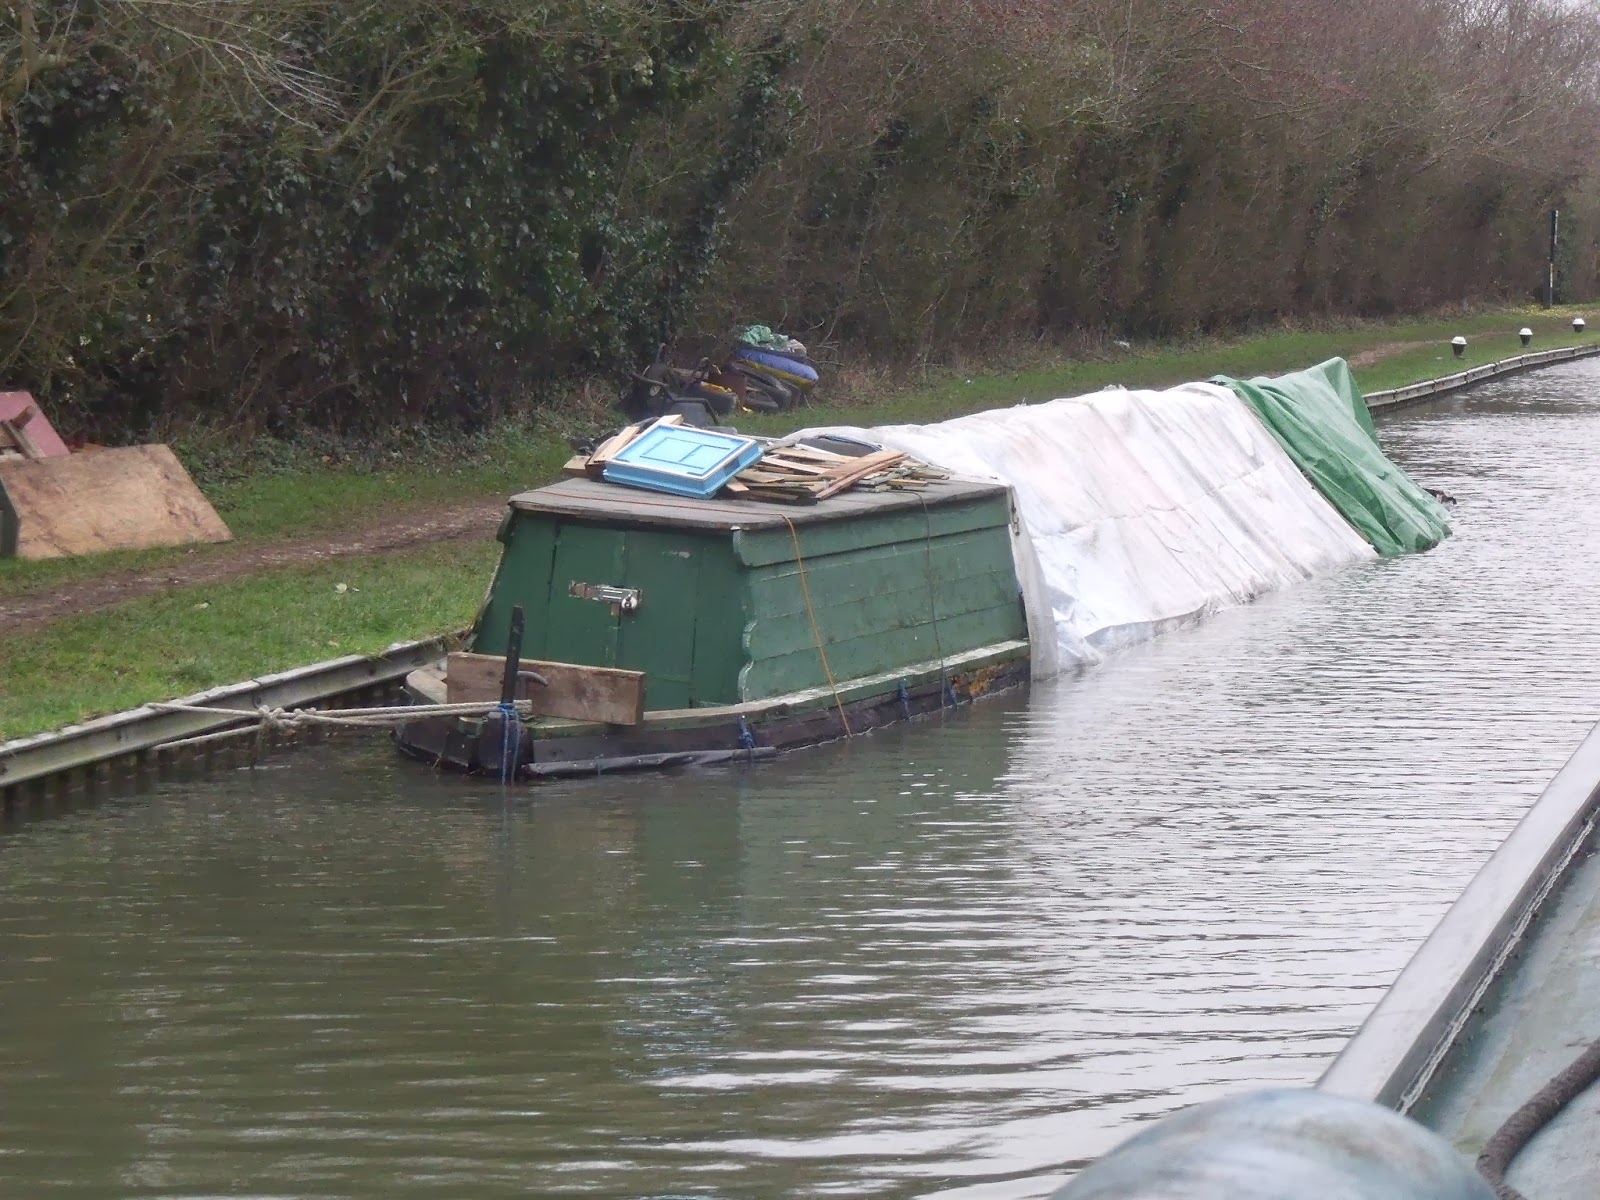
 Just past Pitstone this wooden hull has given in and water has taken it to the bottom.
 Jaq is on steering duty as I swing open the bridge that is only there because a public footpath has been crossed by the canal. The size and strength of the bridge and the five bar gates each side suggest the farmer also has right of way for his tractor.
As usual Jaq and I share the boating duties and now she is on shore duty while I steer.
A couple of locks further on and this is the sight that greeted me next to the lock. We moored up just across from here as the time dictated our day had been long enough. The evening discussion was about that wood pile and I decided that on the way back and after I tried starting the chain saw we would stop and load up. Having done a few locks and with no strain on my mid section I think the 1/2 pulls to start the saw will be within my ability. If the wood has gone then so be it but there is a lot more out of picture so there is plenty to go around with the few boats that are moving.
I meant to have put this on the last post. Always nice sunsets over the reservoir. Might have been better if I had gone up the grass bank and got the water in the pic.


Saturday, January 11, 2014

A look around Marsworth


Two or three days here is like being on holiday. Not new walks but certainly ones we have not walked for quite some time. We have this stretch almost to ourselves with just one other boat out of sight around the bend. The reservoir on the right is almost full and plenty of water is passing down the lock flight via the old side ponds. Tring high street is a 40 minute walk between two reservoirs and along the roads one of which passes over the Wendover Arm.
Behind me as I take the above picture is the bottom lock of the Marsworth flight. The old working boaters called it `Mappers`. Below is a picture of it in about 1900. The White Lion pub, still empty, has lost a couple of chimneys on the right but gained a window top left. Developers are trying to turn it into residential units but a recent application has failed.

http://www.hertfordshire-genealogy.co.uk/data/places/BUCKINGHAMSHIRE/marsworth.htm  about 1900
What else is different in the picture?. Jaq is in the lower picture but there is no sign of the horse and cart that is in the older version. More trees? No telegraph wires?  You can`t miss the difference, follow the bridge across. Yep you got it, the traffic light outside the pub, not in the old picture is it!
 Anyway enough of the spot the difference quiz it`s history time. At one time there was a single lock here built in addition to the original double locks. Sorry if you spotted that difference but you must shout louder. In 1838 it was decided to install an extra single boat lock from here as far north as Stoke Hammond. Six bridges had to have an extra arch and a total of 23 extra locks were installed. The idea was to speed up the single boat traffic as the large number of these boats passing through was such that they were made to wait for a boat to share the double locks so as not to waste water. Remember this is now a downhill section and most of the water comes from the reservoirs and the summit level.
 Extra reservoir capacity, pumps at some locks and the change to boats working as pairs put an end to the single locks.
A lot of the extra lock locations are easily spotted and of course the bridges are still there.

Further along the development on the old British waterways yard at the Aylesbury arm junction has not progressed. More about the proposals on an earlier blog post HERE. It all looks just the same with the exception of the road bridge that will be the main access to the site. Contractors are strengthening it with reinforced concrete. Now I am not sure but seeing as there is not one piece of construction material on site I can only assume they have to do the bridge work as part of planning permission before work starts.
As I took the picture all I hoped was the guys with their pneumatic drills know something about working on 200 year old bridges. Looking from below my feelings are mixed, did they cause that crack or at least are they aware of it, for sure the drilling caused dust to fall into the water and for me to move away real quick. Perhaps my next blog will feature a canal stoppage and the rescue of 3 men and accompanying machinery. If you look at the picture over on the right you will see that the original stonework has no depth in the middle. The newer brickwork in both pictures gives an idea of how deep they are drilling. Where they are drilling is just left of the centre of the arch, fingers crossed they don`t go to deep.


 Above two pictures of the Old manor in church lane just up from the bridge. It is listed and the original house dates back to the 1500`s. Later additions were made in the 17th and 18th century's. I did submit my photos but not sure how long it takes for them to be checked. I have in the past had photos published of other listed buildings so perhaps they will appear sometime.


All Saints church in the village has a modern day connection with the canal when it`s bells were transported by canal. Click on the pictures in this LINK to enlarge them and you will see the loading was done at Marsworth yard. It looks like a fuel boat was perhaps used as a large amount of coal is in the hold.

Thursday, January 09, 2014

On the move again

marina wet dock centre of main building
Yesterday (Wednesday) we went into the marina to have some new domestic batteries fitted. Reversing into the wet dock past moored boats was no fun in the wind. Nothing like winter to show up weak batteries and it`s a well known fact more car starter batteries are sold in winter than the rest of the year.

Ours were 170ah and we had three of them. Just lately they were ending up flat every morning even after a decent charge the evening before and just a couple of hours watching TV so obviously not holding the charge that was going into them. Anyway the replacements were going to be a normal terminal layout against the 170`s having both neg and pos terminals at the same end. So much easier to obtain and cheaper. The reason we went into the marina to have the job done was the sheer weight of the old batteries (80lbs) and their awkward to get at location.  Second reason was the need for some new cables to be made up. My main worry was getting a hernia in the area of my stoma, something I was warned about in hospital could happen if I tried to lift/push heavy things. An hours labour charge and the fact I did not have to source the batteries was well worth it although I would have been so happy to have done the job myself if my fitness level was higher.

The batteries were just two years old and should have lasted longer but we believe a stupid accident a while back cut their life span significantly.

We were coming through Harecastle tunnel and had the washing machine on. Now for those not aware of how boat electrics work this meant we had an inverter running during the wash. The inverter converts the 12volts into 230volts for mains powered appliances like washing machines. Now on board we have an electric mains water heater. This is generally used when hooked up to a mains electric shoreline so would not be used by us when out cruising. Our hot water comes from the engine or our central heating boiler. Some boats can use a mains electric type of water heater on the move but let`s just stick with our set up on Nb Valerie.

So we have the inverter on running the washing machine. Anything running on mains electric does so via the inverter including the water heater. Now as we cruised along one of us went down into the boat and in doing so brushed against the switch panel and activated the water heater. This in turn caused the inverter to work hard pulling a lot/most of the 12 volt power from the batteries to feed the water heaters high power consumption. I noticed something wrong when we exited the tunnel and saw the huge discharge showing on the volt meter. So from this day the batteries were weakened.  The addition, soon after this incident, of our large solar panel probably hugely shielded signs of the weakening batteries.
Sorry fellow boaters that was a bit long but I needed to make all clear to non boaters.

As the title says we moved away from the medical mooring Wednesday. Set off along the summit level heading for Marsworth and the Tring reservoirs. The video below was made by the two happiest boaters on the move that day. It might not be anything special to you readers but to us it was like the news film showing Mandela walking to freedom or the the people breaking through the Berlin wall.

We shared the locks each taking a turn on windlass and tiller. Just by not trying to be clever I found the lock gear winding fine if taken slowly.
Moored up alongside the Startops reservoir last night was amazing. The high winds coming over the reservoir buffeted the boat and the rain beating down on the roof formed a musical accompaniment. Snuggled up in bed it was a wonderful way to fall asleep after a very special day. 

Tuesday, January 07, 2014

Brilliant Steamed Chocolate Pudding!

"Your face makes my soul want to eat chocolate pudding."  ~Andy Milonakis, Greek-American comedian and rapper

   I've never seen anything in the States equivalent to these puddings--be they savory or sweet--which are ubiquitous in the UK. I never experienced anything like them in America.
    If Americans know anything at all about English puddings, they are probably only familiar in passing with the British Christmas pudding--a concoction which contains beef suet along with raisins, spices, and things one thinks of in sweet cakes. The combo of suet with sweets puts most of us Americans off the whole thing. The idea it is steamed and then set on fire takes us beyond the fringe...
   So there I was perusing the Daily Mail Weekend Edition of the newspaper when lo and behold I came across this recipe for a really easy, yummy looking chocolate pudding and I thought, "Give it a go Jaq."
   I did and I have to tell you, it was the easiest dessert I've ever made--it ranks right up there with Angel Bars for ease and deliciousness. It looks gorgeous and tastes divine! 
   While this is called a steamed pudding, Americans should be led to understand that over here the word pudding is a stand-in for the word dessert. It can and does mean any sweet dish served last after the main meal. It is also called "puds..." as in what are we having for puds? So don't expect to steam this baby for 90 minutes and turn out something like a really firm Jello pudding. It is actually more of a cake. And what a cake! It has a light, large crumb and airy feel in the mouth but the rich, deep, indulgent flavor or dark chocolate flirting with orange. I am issuing a personal challenge to all of our American friends, family and readers--try this recipe just once and be sure to let me know what you think!!
   I made one for our Christmas dinner dessert. I opted to top it with a jar sauce from Tesco--salted caramel, served with a scoop of Kelly's of Cornwall Cornish cream Ice Cream. Which reminds me of one last thing in relation to desserts...over here Brits love custard and pour it liberally over anything sweet.  
   For Americans, think of Jello Vanilla pudding which has not quite set. Or for those of you who cook from scratch and have more than a passing acquaintance with high brow cooking, think Cream Anglaise.
   Every time Les asks for custard to pour over one of my lovely desserts--Rhubarb Crumble, chocolate brownies, or a slice of fresh baked cake, I just shake my head in sad disgust. For him it is a timeless tradition. For an American, it is two desserts. Two desserts! We yanks will sometimes order a slice of hot apple pie with a scoop of ice cream, knowing full well we are eating...two desserts. It is the leftover Puritan in us. So I thought I was being quite generous for Christmas puds: steamed chocolate pudding, salted caramel sauce and ice cream! Three desserts!!


CHOCOLATE STEAMED PUDDING (serves 10)
(from the Daily Mail Weekend newspaper's Jamie Oliver recipes)
Ingredients
150 gr (5 1/2 oz) unsalted butter, softened to room temperature, plus 2 T. for greasing the bowl
150 gr (5 1/2 oz) golden caster sugar, plus 2 Tablespoons for sprinkling (in the U.S. use Turbinado sugar or raw cane sugar)
50 gr (1 and 3/4th oz) Green and Black cocoa powder
50 gr (1 and 3/4th oz) of Green and Black or another fine quality 70% dark chocolate, broken up into small chunks
Grated zest of half and orange
3 large eggs
150 gr (5 1/2 oz) self raising flour (in the U.S. use all purpose unbleached flour and add a 1/2 tsp. of baking powder to it)
2 Tablespoons of milk ( I use evaporated milk to provide the rich flavor of cream without the extra calories. You could certainly use semi skimmed milk if you choose). 
CHOCOLATE SAUCE
Ingredients
50 gr (1 and 3/4th oz) unsalted butter
2 Tablespoons of golden syrup (in the U.S. use real maple syrup or corn syrup)
100 ml (3 and 1/2 fluid oz) semi skimmed milk (Again I use evaporate milk for a rich, creamy flavor)
150 gr (5 1/2 oz) of dark chocolate broken into chunks

Preparation
  • In a bowl beat butter and sugar until pale. Add the chocolate, cocoa and orange zest. Blitz (mix) until really fine. 
  • Add eggs, flour (and baking powder for those in U.S.), milk and a pinch of salt.
  • Mix into a batter, stopping to scrape the sides of the mixing bowl with a spatula.
  • Generously grease a 1.3 litre (2 and 1/4th pint) heavy glass bowl with butter.
  • Sprinkle bottom and sides of greased bowl with 2 Tablespoons of sugar.tilting and shaking to evenly cover all sides and the bottom.
  • Spoon in the batter gently.
  • Cover the bowl with foil and pinch it tightly closed all the way around the perimeter of the bowl for a tight seal. 
  • Find a pot big enough for the bowl to sit in. (I used a small heavy glass mixing bowl for my greased and sugared bowl and my soup pot to put it in.)
  • Place the batter filled and foil covered bowl in the larger pan with the foil covered end facing up. Carefully, using a teapot full of boiling water, fill the large, outer pan with water to a point half way up the side of the pudding bowl. 
  • Bring this to a boil, cover with a lid and turn down to a medium simmering boil. Cook for 90 minutes. You may need to add more water to the pan to keep it at a half way point.  
  • About 10 minutes before the pudding is cooked, make your chocolate sauce. 
  • Bring butter, syrup and milk to a simmer in a pan over medium heat. 
  • Turn off the heat, smash up your chocolate, and add it to the pan with a small pinch of salt. 
  • Leave it to melt, stirring now and then with a spatula until you have a lovely sauce. 
  • When the pudding has cooked, turn off the heat. Remove the pudding bowl from the pan carefully (I used large tongs with a rubber grip). 
  • Remove the foil top and turn the pudding out onto a large plate. 
  • Drizzle with chocolate sauce.
  • If you've made the pudding in advance. simply bring it back to a boil and serve it right away. 

Sunday, January 05, 2014

Ozlem's Soup

“Soup is the song of the hearth... and the home.” ~Louis P. De Gouy, author

   This soup is named after our lovely daughter-in-law Ozlem, born and raised in Turkey and taught early, the delicious recipes her mother used to feed their family. We have been fortunate to dine at Ozlem's table a number of times and every meal is a pleasure. 
   When Les was diagnosed with cancer last August, Ozlem gave me her recipe for this Turkish vegetarian soup. We lived off this for months as Les' rectum became ever more constricted with the cancerous mass growing inside, making it nearly impossible for him to eat anything with fiber or substance. This recipe is a major cancer fighter.
   Ozlem's soup nourished us both, kept Les from losing too much weight, helped me to lose some weight, and can be used as a base for other recipes: for example after pureeing this soup one can add in chunks of fresh vegetables for texture and added favor. It can be used as a base for spaghetti sauce if one adds more tomatoes and removes one potato from the recipe or used as a sauce for enciladas. change the herbs and spices and you will change the flavor. This rich, smooth broth tastes delicious spooned over a baked potato or steamed vegetables. Of course, it is simply divine eaten as it is--a humble, simple soup. 

OZLEM'S SOUP (serves 4)
Ingredients
500 ml (2 Cups) water
1 Knorr vegetable stockpot (in the U.S. use Better than Boullion Vegetable base)
1 large onion, peeled and rough chopped
1 large potato, scrubbed but leave the skin on. Cut into 2 inch chunks.
2 medium carrots, scrubbed but leave the skin on and cut into medium chunks
1 large red bell pepper cleaned, and sliced into chunks
2 cloves fresh garlic, peeled and smashed
2 fresh tomatoes cut in half

Preperation
  • Clean and chop all the vegetables except the tomatoes, and set aside in a large bowl.
  • In a soup pot bring the water to a boil and add the stockpot and stir until dissolved.
  • Add in the raw, chopped veg. It will appear there is not enough liquid for them but as the vegetables cook they will release their juices and the volume of liquid will rise. 
  • Bring to a boil and cover the soup. Turn down and simmer for fifteen minutes. 
  • The tomatoes need to be blanched to remove their skins. I do this by simply laying the tomato halves, cut side up in the top of the pot of boiling vegetables. I push the tomatoes down so they are mostly submerged, put the lid back on the pan and let it all come back to a boil for about five minutes. Then I scoop the tomatoes into a bowl and let them cool off for a few minutes. The skins peel away easily. Add the tomatoes back to the pan, cover everything and let it simmer for another 30 minutes.
  • Test your vegetables to make sure they are tender and cooked all the way through. If so then set the pan aside and let everything cool down to warm. 
  • With an immersion blender, puree the contents of the soup pot until smooth and no chunks of vegetables remain. 
  • Season with Paprika and cumin to taste. 
  • Reheat and serve. 
(If you want Italian flavor then leave out the paprika a and cumin. Instead add in basil, oregano, and toasted, ground fennel seeds. Stir in a couple of Tablespoons of grated Parmesan. For Mexican flavor, up the amount of garlic cloves in the original recipe to 4. Add in chile powder, cumin, and cilantro.)

Friday, January 03, 2014

Recipes: Italian Food for a Cold and Windy Winter's Day!

"Life is a combination of magic and pasta. " ~Frederico Fellini

   Usually when one hears the words "Italian food" one thinks of plates of pasta and thick, savory sauces; or pizza pies fresh from a wood oven with a cornucopia of toppings peeking out from underneath a lace curtain of melted, shredded cheese. 
   On this boat, Italian on a winter's day means two things: Homemade Minestrone soup and Sformato di Mele--Italian Bread Pudding with Apricot Preserves and Apple Chunks.
   I don't even like bread pudding--or anything requiring bread I might eat--to become soggy in any way, shape, or form. But this recipe is magnificent! The custard filling envelopes the bread and offers a bed of eggs, cream, milk and flavor upon which the apples rest as they cook. Small spoonfuls of apricot preserve are tucked down into the pudding to surprise and delight the taste buds. Cooked in a Bain Marie, the body of this pud is a set custard. The sugar and cinnamon top is crackled and brown. This pudding offers sweet, salty, sour, creamy, crunchy, smooth, and crackly all on one spoon!
   The soup? Ahhhh now generally Minestrone is an Italian version of vegetable soup. It is versatile enough to take some changes of ingredients in its stride and still turn out a sumptuous pot of flavorful soup that will have folks begging for more. It takes little more than two hours and makes enough to feed 8 or provide leftovers for 2-6. It only grows tastier the next day as the ingredients marry together to provide stick to your ribs deliciousness perfect for cold, dirty weather.
   I am posting these and other recipes as the week unfolds at the request of friends, family, and blog readers who have asked, begged, cajoled, and come to sup at our table. For today's wonderful visitor Carol Ives I include my soup. For anonymous A, I include the Bread pudding. Thank you for gracing our floating home with your company. Mangia bene!!

MINESTRONE SOUP
Ingredients
2 Tablespoons olive oil
6 cups (150 ml) of beef or vegetable stock (Over here I use Knorr Beef stock pots--one for every 500  ml, or 3 stockpots of 6 cups of hot water which will make a lovely broth. In the States I used Better Than Boullion Beef soup base which is superb!!)
2  16 oz. cans of stewed tomatoes (one 500 gram container of Passata is what I use, with a 1/4 cup (2 oz./60 ml) of tap water to rinse the container into the
soup pot)
3 carrots, peeled and cubed
1 onion diced
8 oz. (half a pound or 230 gr) of fine trimmed string (green) beans, cut into thirds
2 small zucchini (courgette) , halved and sliced thin (I don't like these so I leave them out)
2 stalks of fresh celery, cleaned, halved and sliced
12 oz. of cabbage chopped into pieces (another item I don't care for cooked, so I only use about 2 oz.)
4 cloves of garlic, peeled, smashed and diced medium small
One 15 oz. can of cannellini white beans, drained (one small cardboard pack of beans from Tescos)
2 large potatoes, peeled and chopped into 1.5 inch chunks
2 Tablespoons chopped fresh parsley
One 200 gr (8 oz or half a pound) package of Tesco Cooking Chorizo sausage (this is not in the original recipe but we love the way it flavors the soup and adds protein without a lot of added meat. I prick the four small lsausages all over, grill them until crispy and most of the grease has drained, and when cool I cut all four sausages into coin sized rounds)
1 pound (450 gr) of pasta (I like orichiette best. My next favorite is orzo)
Basil, chopped fine (I use the the fresh chopped Basil in the tube from Tesco)
Parmesan Cheese (I often throw in the hard rind from a chunk of old cheese. I freeze it until I need for Minestrone. Otherwise, use about 1/4 cup of finely grated Parmesan.)
Salt and Pepper to taste (Go easy on the salt. The Beef stock will offer a lot of salt.)

preparation
  • Clean and chop all of your veg and set it aside in a large bowl.  
  • Heat your 6 cups of water to a boil and add the stock pots/bouillon. Stir well and set aside. 
  • Open your can/carton of stewed tomatoes/passata and set aside.
  • Place about 2 Tablespoons of olive oil in your heavy duty soup pot or dutch oven on a medium high flame. When the oil is hot enough to sputter, add all the veg in at once, stirring every few minutes so things brown but don't burn.
  • Saute for ten minutes. 
  • Add garlic and stir in, sautéing for two additional minutes. 
  • Add in all 6 cups of soup stock, teh container of tomatoes/passata, and cover with a lid. 
  • Bring to a boil and turn the heat down so the soup simmers when covered. Simmer for 40 minutes. 
  • In the meantime grill the chorizo, drain the grease away, let cool and slice into coin size rounds. When the soup has simmered for 40 minutes, add the chorizo, salt and pepper to taste, stir in the freshly diced parsley, and season with several large squeezes of Basil. If you use fresh Basil leaves, bruise them well and dice them into a fine chiffonade just before adding them to the pot.  Use your judgment as to how much. Basil is quite a strong herb. You can always add more near the end of cooking. 
  • Toss in the Parmesan rind now; otherwise, wait until just before serving to stir in grated Parmesan.
  • At this time you may, if you like your soup to have a spicy heat, add Paprika, or red chile flakes--just remember this is LARGE pot of soup. Unless you plan to eat it all yourself, don't over spice it! 
  • Add in the pasta, stir well, bring back to a boil, turn down to a simmer with the lid on, and let your soup resume cooking for another 30 minutes, stirring occasionally to keep the pasta from sticking to the bottom. 
  • During this time you ingredients will make an amazing change in the pot. The broth will thicken and come into its own with a lovely taste. Just before serving one may add more basil if needed, also add grated Parmesan if you are using and stir it through the broth. 
Italian Bread Pudding (Sformato di Mele) Serves 6-8 
from Lidia Bastianich Cooks Italian recipe book
Ingredients
One Tablespoon of softened butter
One cup plus 2 Tablespoons of demerrara or raw cane sugar (the unbleached coarse stuff!)
1/2 teaspoon of ground cinnamon
6 large eggs
1 cup (240 ml) of heavy cream (substitute Marscarpone for something totally luscious)
1 cup (240 ml) of evaporated milk
1/4 teaspoon of salt
1/2 teaspoon of good, pure vanilla extract 
2 teaspoons finely grated lemon zest (the zest from one lemon)
3 cups (700 ml) of day old, good quality white bread with the crusts removed. Cut into 1/2 inch cubes and set aside in a bowl
1.5 pounds (670 gr) of firm apples (Braeburn, Golden Delicious or a Cox's. Do not use Bramleys or Granny Smith) peeled, cored, and cut into 1/2 inch chunks. Set aside in a bowl. Sprinkle with a bit of lemon juice to keep them from going brown.
6 Tablespoons of really good Apricot Preserves. I use St. Dalfours which is French and has no extra sugar--just that which is naturally in the fruit. 

Preparation
  • Use a 2 quart or 7 x 11 inch rectangular baking dish
  • Arrange the oven rack in the middle of the oven and preheat to 350 F (gas mark 4)
  • Fill your large tea kettle with water and bring it to a boil. Set it aside. You will be using it to create a Bain Marie--a water bath in which to cook the bread pudding.
  • Coat the bottom and sides of the baking dish with softened butter.
  • Sprinkle 3 Tablespoons of sugar in the baking dish. Tilt and shake the pan so the bottom and sides are coated evenly in sugar. Set aside. 
  • Stir together 1/4th cup (50 gr) of sugar and 2 teaspoons of ground cinnamon. Place in a small cup or bowl and set aside. 
  • In a large bowl, whisk all 6 eggs until thoroughly blended. Gradually pour in cream or Marscarpone, and evaporated milk. Whisk thoroughly to mix and add 3/4th cup (150 gr)  of sugar. Whisk briskly until sugar is dissolved. 
  • Whisk in salt, vanilla extract and lemon zest.
  • Fold the dried bread cubes into the custard using a rubber spatula. Gently mix it all well and let the bread soak up the custard for about five minutes.
  • Fold in the apple chunks with the rubber spatula and mix well until everything is well coated in custard batter. 
  • Spoon into the prepared baking dish and smooth the top.
  • Drop apricot preserves across the top by the teaspoonfuls and tuck them down into the custard, bread and apples. don't leave the preserves sitting on top. 
  • Sprinkle the top with the cinnamon and sugar mixture. Be sure to cover the entire top including the corners. 
  • Using a large roasting pan, set the baking dish filled with pudding inside. 
  • Open the oven door, pull out the middle rack and place the roasting pan on the oven rack. 
  • Use the boiling hot water in the tea kettle to fill the roasting pan with water only half way up the sides of the baking dish with the pudding inside. Be careful not to splash water in the pudding. 
  • Push the oven rack in and close the oven door. 
  • Set the timer for 30 minutes. When it goes off, open the oven door, carefully remove the roasting pan with the water and pudding, turn the roasting pan around so the other side of the pudding is now facing the back of the oven and return the roasting pan and steaming pudding back to the oven on the middle rack. Set the timer for another 30 minutes. 
  • When the timer goes off again, remove everything form the oven, stick a butter knife in the middle of the pudding. If it comes out clean nd the top if browned and crispy, the pudding is done. If there is a schmeer of custard on your knife then return the pud to the oven and set the timer for 15 minutes. 
  • When the timer goes off again, shut off the oven and leave the pud inside to gently cool down in the water bath. 
  • Serve when still warm.

NB Valerie & Steam Train by Les Biggs

NB Valerie & Steam Train by Les Biggs